Sunday, November 27, 2011

Learning in Public #6- Moral and Ethical 3D Printing?

My First Modelling Challenge for Myself
40 hours of work into the Makerbot obviously isn't enough. I keep coming back for more! This weekend I was able to spend some awesome time with a friend and fellow ADE Jason Sand. If you aren't following Jason on the Twitter, do it here now! Jason and I were at a Final Cut Pro X training session for two days.

During this weekend of hockey and refreshments and keyboard shortcuts galore we tried unsuccessfully to print an iPad audio megaphone on the Makerbot. I'm going to try to print from an SD card which is highly recommended from the Google Makerbot Users forum.

While driving to the training we talked about things we like, and the fact that we both have the iPod Nano watch clip from Lunatik. As we drove Jason remarked how he uses a second clip for his to keep the bands attached, to which I responded, "We could print that." The conversation continued and more and more anytime something came up about an object we agreed that "we could print that." With a 3D printer at your disposal you honestly look at the world in a different way.


Google Sketchup to the Rescue
With my nano watch case in hand I took to Sketchup to try and model the holder. I'd really like to print the holder in many colours and reproduce it. Most importantly as my students work on designing their first product, a name keychain, I want to show them that I'm learning as well.

I tinkered for about 45 minutes to produce a fairly good model of the watch clip. Actually I'm pretty darn proud of it. It's not to scale, but I learned a lot about modelling today. First, when using Sketchup, it's good to think of everything as a product of shapes being added or taken away. Second, it's way easier to model if you start of one axis and stay on that axis. I started by clicking MODEL>Camera>TOP and then began my model.

My Model with the actual product


My version of the clip started out as a rectangle and from there I pushed, pulled, and figured out the curve tool. I'm excited to share this with my students and model it again after I take precise measurements with some newly acquired digital callipers.

I think a cool challenge for students in my class would be to take an object, and have them take measurements from it, sketch it, model it and try and print as close to the original object as possible. They'd get gain some serious skills and confidence in modelling then!

Implications for Teaching
Copyright, copyright, copyright! What gives me the right to copy an object and make it? It turns out, this is a grey area. An interesting article from a NY Times Bits blogger poses the ethical and legal questions about copying objects in his post "Disrtuptions: The 3D Printing Free For All." In this interesting post there is a comment about the difference between an aesthetic object versus a useful object:

“Copyright doesn’t necessarily protect useful things,” said Michael Weinberg, a senior staff attorney with Public Knowledge, a Washington digital advocacy group. “If an object is purely aesthetic it will be protected by copyright, but if the object does something, it is not the kind of thing that can be protected.” 


So, aren't a lot of ideas basically revised versions of previous products? This is the case of the coffee mug that has been proposed in Nick Bolton's post. Who owns the coffee mug? If it's a useful object, am I going to be sued for copyright or illegal manufacturing? I don't want to be the next Samsung with Lunatik coming after me for reproducing it's product in another colour that I like. 


Where does this put teachers who are using 3D printers in their classrooms? Do we tell students we will not print anything that is an idea taken from someone else on moral/ethical grounds? I'm kind of answering my own questions here, but perhaps my own printing of the Lunatik could be the opportunity for students to reflect about their own designing. I also don't know what different copyright laws have on physical useful objects in Canada versus the USA.

In the end I'd honestly like a student to design their own iPod Nano clip or watch, so perhaps after I'm done this model I will show them some ideas I have to make my own design.

From Days Gone By
What's starting with these economic 3D printers is that people aren't automatically thinking that they need to throw things out. Need a 2003 Dodge Neon Visor clip? Download it and print it!


 Or better yet, take the original design that is shared online and make it better.

I think about when my great grandparents came to Canada and settled west of my home town, Cold Lake, Alberta. When they bought some nails, they expected that they would last a long time. These nails would be used in fences and buildings, and if these structures were torn down, the nails were saved. If they were bent, they were straightened. My grandfather showed me how to straighten nails in the summers we spent at his house, he had a whole coffee tin full of them. Somehow now it seems like it can be my turn to keep things alive in their usefulness. That's a cool feeling.


As teachers we do have a responsibility to help student be aware of ethical/moral issues in what we do. What are your thoughts about students designing products like I have here?


Also, coming up this week we will start out 20% "tinkertime". I'll be sure to share how this goes soon.


Tuesday, November 22, 2011

Learning in Public Reflection #5

The Makerbot is up and running in full swing. I've printed alligators, dinosaurs, moustache rings and now a moustache cookie cutter. The learning curve is fairly steep, but the work done by others is making this learning so enjoyable.

What's awesome about the 3D printing community is that they are much like my Tweeps: THEY SHARE! They don't judge (too much) and will always point me in the right direction.

Case and point is my cookie cutter print. I've been trying to find the time to get some Google Sketchup practice in, but I'm finding it very challenging. Our Food Studies teacher is getting students to make baked  goods in the shape of moustaches. She got her father (who is an Industrial Arts teacher) to make amazing aluminum moustache molds by wrapping them around wooden shapes and then welding them together. Great effort went into these products. I wish I knew how to weld!

I was inspired to try and make my own cookie cutters from the makerbot. Thingiverse has many of them that are shared. After searching around the web I stumbled upon something that amazed me. On the Guru Blog, by Nikolaus Granwhol, he has created a cookie cutter maker that is a simple node editor that allow background images to be traced! Here's the image I used as my backdrop.

Next the program exported the STL file needed by ReplicatorG to communicate with the Makerbot. Here you can scale it, and move the shape around to get the best fit for the size of the platform.

My first print was pretty decent, with some major errors where you would push on the cookie cutter. I learned within the 11 minute print that my extruder Z height was too high, and that I needed to adjust the temperature of the Heated Build Platform to around 130C. I've been running it at 120, but without a raft this temp hasn't been cutting it.


The second print was more successful and a different colour! 


Things to Work On
Today when I was printing 1 moustache ring at a time for our Movember fundraiser, I was looking longingly at all the extra space around the ring. I need to learn commands such as multiply in the GCode that is generated by RepG and Skeinforge. Thanks to the MAkerbot community online I've received 11 responses in the past few hours! Multiple moustaches will be printed at once tomorrow!

Satisfying Learning, Will Need Second Bot Soon! 
It's so satisfying to have something to look at and analyze within a few minutes. One implication for my class is to have my students print in plastic as a final product instead of printing several iterations of their designs. Printing may be backing up very soon.

One thing I find myself doing more of is taking tons of photos and videos of our class printing. I'm encouraging cells phones to be out for documentation sake and it's generating a nice archive of my journey.

In All Seriousness
I'm going to have to be careful as to my approach. I may even have to just try my approach out this unit and make adjustments as we go along. My wiki I'm starting for Design Studies can be found here. Right now, students are struggling to follow this design process and not jump right into prototyping and modelling in Sketchup. I don't want to stifle their enthusiasm, but I want them to think critically about the evolution of their products. For their first challenge I've given them the task of creating a unique 3D Keychain with their name/initials on it.

Take a look at my wiki and outline of the Design Process I've given them. What could I do differently? What guiding questions could I ask of them?

Keep it awesome!


Wednesday, November 16, 2011

Learning in Public Reflection #4- Success at Last!

I've been taking a lot of videos and time lapse sequences about how I've taken on one of the largest personal learning projects I've taken on in a long time. Building a Makerbot 3D Printer. Here's a Makerbot 101 video to check out. Below is a time lapse of part of the build.


All of this has been from a post by Dean Shareski who has challenged his pre-service teachers to spend 25-50 hours on their own learning project.  He's learning to play guitar!

During the build I've been reflecting on how my learning translated into how I'm going to facilitate the learning of my students when they start to design 3D objects in a design studies class. Physically I've spend around 20 hours with the 3D printer to date, but I've spent countless hours researching and crowd sourcing problems and challenges along the way.

To catch up on what I've been up to check out my previous posts here, here, and HERE! 

I estimate I'm about 40 hours committed in total to the project so far.

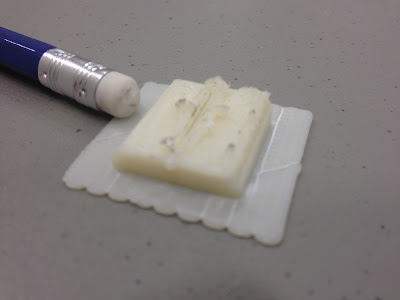
Today was a monumental day. It was the first time I got to see the Makerbot in deliberate action. Just before lunch my work experience student Nathan helped me to test the extrusion at temperatures hot enough to melt the ABS plastic. The result was less that stellar, but it was a necessary step.

Amazing how this failed cube represents so many successes in this project!


Some of my learning:

1. Many 'Failures' 
I thought that I'd be printing 2 days ago, but many things have come up. The filament tension wasn't correct, and I struggled to get all of the end stops on the X and Y axis to work properly. Nathan took apart the entire extruder module 3 times to get it just right. We played with the RPM with no luck. My test prints are really awful, but I see these 'failures' as little successes or iterations on the way to a final goal.


2. Skills vs. Abstract Ideas/Problem Solving.
Dean mentions these two parts of learning in his post, "The Dan Plan". So many times I've gone back and forth between these two. My thought is: are they really separate? I've gained many skills in construction along the way. Could anyone build the physical Makerbot? I truly believe that just about anyone could. Where they might have challenges would be in the gaps in the wiki instructions online, and reality of so many parts and mini-projects that they would face.

The real difference between skills and problem solving can be explained in context of my current project. While I can learn to build and print physical objects, learning about design process, and learning how to take ideas for the physical from conception to the printing stage involves many steps in problem solving. This comparison was made by Dan McLaughlin in Dean's interview with him as the difference between learning to hit a golf ball at the range, or dealing with the stresses of a tournament, including the highs and lows of emotions in between each stroke.

Another way to look at it is from my own sports experience. When I was 19 I started playing rugby. I had a couple weeks of practice getting physically ready for the game, but I didn't have the foggiest about how the game was actually played until I played a real match. So in terms of my own teaching and wanting students to use their skills and be problem solvers, how do I 'teach' problem solving and abstract thinking?

To me, it's the difference between a contrived artificial task versus the real deal. Just like Dan McLaughlin golfing, our classrooms are like the driving range where we develop skills to repeat tasks in learning. So how do I get my teaching and learning out on the course during a tournament?


3. Crowd Sourcing Works: Capitalize on the Expertise of Others
This has proven invaluable. After my unsuccessful attempts to get the firmware for the motherboard and extruder controller working, I went to the Google Makerbot User Group to ask for help. The result was awesome! Several responses within half a day and even an offer of a phone call and personal help from another Makerbot owner! Last night my connections on Facebook paid off when I got a message from a Facebook friend who knew someone in my home town of Cold Lake who has a Makerbot! Within 30 minutes phone numbers were exchanged and I chatted for an hour with him and gained valuable insights into 3D printing.


4. Share Your Learning
When is the last time you had a discussion with someone about what you're enjoying/excited about learning? I really hope that by students watching my project, they will buy in even more. I want them to see their nerdy teacher in action and see that its OK to be passionate about something!

Here's a video that shows my 'Christmas Morning' response to today's 3D printing. I actually made this work!!!!


What are your thoughts about skills vs. problems solving? Can/should the two be separated or intertwined? Do we need to stay on the practice mat at the driving range for a while or do we enter our students in a tournament? More to come about  this soon!

Monday, November 7, 2011

It Began With a Marshmallow

Students were DQ'd if they ate their marshmallow. Some groups used permanent marker to ensure this wouldn't happen.

Today was an awesome day. Hot on the heels of some great collaboration and conversations with colleagues and tweeps I started my Design Studies unit with The Marshmallow Challenge. Huge thanks to Rose Lapointe for guiding me in this way. I now realize that I was the student and she was the teacher during our conversations. I learned so much as we hashed out timing, and supplies, and so many more ideas for this activity. It looked like this on her board:


On Sunday we chatted about the Design Process, and I took more away from that conversation than I had in a week of reading. Conversation kicks @$$! I highly recommend it.

If you haven't seen the TED Talk about the Marshmallow Challenge, make sure you check it out. The challenge is for groups to take a marshmallow, 20 spaghetti sticks, a metre of twine, and a metre of tape and build the tallest free standing structure they can in only 18 minutes. There is also a simple blog page that you can access to view the concise instructions for your class. I would recommend this activity for just about any age level. In fact, one of the findings shared on the TED talk is that Kindergarten students out perform most adults!


I took about 20 minutes to give an overview of the challenge, the rules, and then I set them free. First thing I saw was that out of the 4 groups of 4, almost 1 person form every group checked out right away. Others were busy talking, drawing, and getting ready to build.


I let the students have the 18 minutes and gave time cues on a countdown on the whiteboard on my Macbook. Most groups took 4-5 minutes just to talk and draw. One group grabbed the spaghetti right away and talked as they started making columns for their base. At the end of the 18 minutes they had to remove their hands from the structure. 2 out of 4 failed due to the weight of the marshmallow snapping the spaghetti. Catastrophic failures occurred. The 2 remaining measured a mere 18cm tall and just under 40 cm tall. Not bad for a first try. 

The 17cm high tower. I called this one "the campfire"

37cm tall strength in triangles.

I asked students some guiding questions about their work:
1. How much of your time was spent planning vs building? Most said for every minute planning they had 3 minutes building. 
2. How many of the groups created more than one design in the 18 minutes? None of the groups had.
3. What group dynamics affected your ability to build the tower? Some were told they were bossy, some felt they didn't feel comfortable talking and sharing, groups also said that there was overall, a lack of communication. 
4. What changes would you recommend if you could do it again? Most talked about the stability of the base as the key to success. Planning and communication came up again. 

5. Did you see your tower as a success or failure? Even those who did have a standing tower said yes. They wanted it to be higher. 

At this point in a class I threw them a curveball. I started the TED Talk and stopped it about 30 seconds in. I told them to think of their first tower not as a failure, but as version 1.0, just like an early version of computer software. They then found out that after the video they would get to build version 2.0 with another set of fresh supplies. 

Instant planning started. They were watching the video and sketching, and getting ready to build a tower in another 18 minutes. 


After the TED Talk I let them loose again. There were less groups drawing again, most were building just about right away. This was great to see the enthusiasm of attacking the second round of challenge, but also something I need to be aware of as we move forward. They were learning by doing, and since the last tower wasn't a failure, they took the parts of the previous tower that worked and incorporated them into their new design.

With the last seconds counting down I thought 2 groups would have broken towers again, but luckily they stayed upright. This time 4 of 4 towers soared above the desktops. They measured 18cm, 24cm, 47cm, and a whopping 67.5cm! The team pictured below that had the tallest towered placed a stabilizer string on the tower and fastened it to the desktop with tape at the very last moment.

I told them that I was very pleased and proud that they were able to either improve their tower immensely, or get it to stand the second time around. More importantly, all but two students worked hard in their teams to make their "Marshmallow Tower 2.0" higher than their previous attempt.

The winning tower. 67.5cm tall.

This was their first taste of iterative design and learning from 'failures', which I think we will call 'versions' or 'attempts' from now on in my class. 


Next up is a Transportation Challenge where students have to use the design process to come up with a solution to a BIG problem that I'm calling the Transportation Challenge. How can we get people and other goods across a span safely and efficiently? This is something that in remote locations in the world with fragile infrastructure systems and unpredictable weather, can directly affect communities. People can be cut off from much needed supplies.  Students will be working in class with a 1.2 metre span between two desks to come up with a system that can be installed when existing roads, bridges, and ferries are washed out or impassable.

Tomorrow will start with us reviewing the steps we took with the marshmallow towers. As they describe their steps, students will actually be identifying their actions as parts of the design process. From their I will frame the Transportation Challenge and tell them that their team has been hired to solve a issue about food and supplies not reaching people in need.

How would you use the Marshmallow Challenge in your class? Any ideas for how I can facilitate the next challenge?


Sunday, November 6, 2011

Opening Up to My Staff

A few people on my staff know I blog about my class. Most don't I don't advertise a lot on staff that I tweet, read blogs, and collaborate with people outside my school more than inside my school.

This really struck a chord with me recently.

So, under the guise of asking for supplies for my Design Studies unit, I wrote this email to my staff tonight. I officially came out as a blogger and learner and invited my colleagues to have a conversation with me. Here's what I wrote:


"I'm starting a new unit this week with my MM class called Design Studies. 

http://2pointohteaching.blogspot.com/2011/11/design-thinking-new-challenge.html

Part of the course is to use the design process to create 'things'- products, etc in Google Sketchup and then model them in 3D plastic. 

I would like to ask you if you could spare some 'stuff' you may have in the recycle bin or garage for my students to prototype physical models: cardboard,  paper towel tubes, pipe cleaners, popsicle sticks, large foam chunks, etc. Stuff they can shape, bend, cut, old pool noodles... I would like to have a cache for students to access.

Here's what I'm going to be doing. Many of you do know that I'm a nerd and like geeky things. My latest geeky thing that I'm super excited about is 3D printing. I also blog about my teaching from time to time and I've done so about this latest change. My blog really HONEST about my teaching and is a place where I hash out ideas. 

http://2pointohteaching.blogspot.com/

Terry Kaminski also shares the great work he does on his own blog: The Transformed Educator. If you haven't checked it out and heard about what Terry's excited about this year by 'flipping' his class you need to check his blog out! 

http://transformededucator.blogspot.com/

Furthermore, if you have a blog or space where you share your teaching and learning, let everyone know! Conversations about teaching and learning can lead to great things. 

I haven't openly advertised my blog before, but it's time to out myself as a learner. If you take a read perhaps we could have a conversation about any ideas, what awesome things you're doing in the class, or suggestions you might have to my approach. Your comments would be greatly appreciated. Drop by room 1517, I'm the guy with the pathetic attempt of a moustache and new haircut. I've had some awesome conversations with staff members lately about what I'm doing and they'd helped immensely. 

Anytime you might have to drop of supplies would be greatly appreciated. I'm going to become a scrounger. There's a large bin at the front of my room where I'm gathering supplies if I'm not there. 

Thanks so much. 

Yes, I'm going to blog about me telling y'all about my blogging. 

Jared"

So, have you experienced this with your colleagues before? Have you felt like you've led a double life and kept your learning outside the school and separate from colleagues. I really hope good things can come from an invitation to chat. 


Saturday, November 5, 2011

Design Thinking: A New Challenge


This is going to be one of those posts where I'm actually writing for me to try and make some sense of a whole bunch of ideas for the next steps in my multimedia course.


Until now, the term 'multimedia' has largely been a farce because I haven't dealt with a true variety of media with students. I'm a video guy, that's where I'm comfortable so that's what we've done. Everything has been about the end product that is due on day X and here's the evaluation rubric.


Now I'm excited to throw that out and start fresh next week.


Wrapping My Brain Around This
With my recent acquisition of a couple Makerbots I'm pumped to be able to take an idea for a product/object/implement that fills a need, draw out some sketches, model it with Google's Sketchup, and then print it in 3D. Take the model, try it out and make revisions as needed until it's completed to my satisfaction. 


The video below is showing part of the 16 hrs of work I've put into the Makerbot so far. 


Basically in a very simplistic way, this is a way of creation through the design process.


Over the past few days I've spent time looking for resources about the Design Process and found a few that were extremely helpful. Here's a Google Doc that I created to share them. It's pretty lean right now, but bear with me, I'll add more this weekend.


I stopped for a while today and thought about where else I could go for resources and inspiration for this, and TED seemed like a logical one. Tim Brown from IDEO gave a talk 2 years ago and it contains some interesting points that I've taken to heart:


"Design thinking [has] rapidly moved on to learning by making. Instead of thinking of what to build, we're building in order to think".


Pretty awesome statement.  He goes on to discuss prototyping as a way of speeding up the process of evolution of ideas. The faster the prototyping process, the faster our ideas can evolve. 


This presents an interesting situation for educators. We don't leave time in our lessons for multiple ideas to be pursued. The teacher traditionally has an idea of what the correct answer is, and is basically waiting for the students to spit it back at them. The students know this, and in order to play along with the game, they simply respond accordingly because it's a whole lot less painful. In essence we've trained passive thinkers. I reflected on this last weekend in a video (skip to 1:45):


Going through the design process with students is going to be tough for highly trained passive learners, and myself who is used to knowing where we will end up. Right now I don't know where we'll end up. Scary, but exciting. Tim Brown's talk highlighted the need for the population to be shift from consumption to participation. This hits the nail on the educational head. He remarks that:


"instead of seeing it's primary objective as consumption, design thinking is beginning to explore the potential of participation...giving experiences that are meaningful and productive"


From their Educator's Guide, IDEO's Design Thinking Process details 5 steps:

1. Discovery – I have a challenge. How do I approach it? 
2. Interpretation – I learned something. How do I interpret it?
3. Ideation – I see an opportunity. What do I create?
4. Experimentation – I have an idea. How do I build it?
5. Evolution – I tried something new. How do I evolve it?

Bumpy Roads Ahead
Some great discussion ideas and  scenarios have come up in my research and from conversations I've had with Terry Kaminski and Neil Stephenson. 


1. What are the big ideas and  challenges that I can give students? Typically teachers give an end product as the goal of their assignments, such as an essay, a lab report, a free throw. This way of thinking is confining and narrow. I will probably need to have dedicated 


2. Technology might be a barrier to learning. Will JIT Learning (just in time) cut it with creating tangible prototypes once students take their ideas into Google Sketchup and other programs? I will need to spend some deliberate learning time concentrating on their sketchup skills to make sure it doesn't frustrate them. On the other hand, with all the online tutorials out there, perhaps recognizing that more discovery is needed will be part of the process. My job will be to guide them towards that realization. 


3. Reinforcing the process and re-iteration will be keys. Are students going to just want to get it done? How can I pose questions and help them look critically at their thinking, planning and prototyping? 


4. The end result in plastic from the Makerbot isn't what this is all about. It's a nice reward to have something they can physically take with them at the end of the project, but should take a back seat to the process. 


5. Maintaining enthusiasm. I can see several students ripping through the process just wanting to print things right away. This is where phrasing the challenge, and enforcement of the steps will be key. 


6. Balancing individual contribution while working in a supportive team environment. We all were in a group project in school where we were the one who did all the work or none of the work. By creating design teams, with cool names to boot, students can bounce ideas off each other, and then take the challenges presented to them and plan and interpret them in their own ways. Individuals an create their own designs and then present them to the group. The group may be inspired to take components of  several models and incorporate them 


7. Share awesome ideas with students. Thingiverse.com is buzzing with tons of awesome things to inspire.


8. The BIGGER the idea the better. Tim Brown's Ted Talk  had a slide at 13:50 had some HUGE questions that designers face today. Why not incorporate questions at this level to my students? Do I go HUGE global/issues based, or smaller local, challenge based with students creating household items and products that directly affect them? Start small and build up? What do you think? 


9. Get my class full of stuff. Paper, cardboard, scissors, glue, paper towel tubes, pipe cleaners, popsicle sticks, anything that students can use to prototype. I need to treat the plastic model as their 'final' prototype. It's not to say that they can't change it once they see the printed plastic model. That would actually be a requirement.


10. Blogging is a perfect fit for this process for students. 


11. Big questions bring big ideas. Is design thinking new? Or are we just quantifying and labelling a process that teachers often do in their teaching? That's another debate for another post. 


I've got a lot to learn still about the Makerbot, Google Sketchup and how I'm going to present the design process to my students. This will continue to be my "Learning in Public" project over the next few months. 


So, I put it back to you, the reader. What's your take on design thinking and implementing it in the classroom? What advice would you give me before I take off on this new adventure?